How to Replace a Hard Drive
— Desktop & Laptop Guide
Replacing a hard drive is one of those jobs that sounds intimidating but is actually pretty straightforward once you've seen it done. Sometimes it's a failing drive that's clicking or grinding, sometimes it's a perfectly healthy hard drive being swapped for an SSD because the client is tired of waiting three minutes for their computer to boot. Either way, the process is the same: take the old drive out, put the new one in, and get Windows running on it. This guide covers both desktops and laptops, and I'll walk you through both ways of getting Windows onto your new drive — cloning (copying everything from the old one) or doing a clean install (starting fresh). If you're upgrading specifically for speed, this pairs with our How to Speed Up an Old PC guide.
This guide is part of our complete Upgrading or Replacing Your Drive series.
1 Signs Your Hard Drive Is Failing
If you're here because your hard drive is already acting up, here are the warning signs that mean it's time to replace it sooner rather than later:
Clicking, grinding, or ticking sounds — a healthy hard drive is mostly silent. Mechanical noises mean the read/write head or motor is failing. This is urgent — back up immediately.
Frequent freezes and crashes — your computer locks up randomly, programs stop responding, or you get blue screens. If this started happening gradually and is getting worse, the drive is likely developing bad sectors.
Files disappearing or becoming corrupted — you saved a document yesterday and today it won't open, or entire folders seem to vanish. The drive is losing the ability to reliably store data.
Extremely slow performance — everything takes forever, even simple tasks like opening a folder. If your CPU and RAM look fine in Task Manager but everything is still sluggish, the drive is the bottleneck.
S.M.A.R.T. warnings — Windows or your BIOS may display a warning that your drive is failing. This comes from the drive's built-in health monitoring system (S.M.A.R.T.), and if it's triggered, take it seriously. You can check your drive's S.M.A.R.T. status by opening Command Prompt as Administrator and typing: wmic diskdrive get status. If it says anything other than "OK," start planning the replacement.
Stop using it immediately and back up your data. A clicking drive can fail completely at any moment — sometimes within hours. Copy your most important files to an external drive or cloud storage right now, before doing anything else. Every minute you keep using a clicking drive reduces the chance of recovering your data.
2 Choosing Your Replacement Drive
Unless you have a specific reason to buy another traditional hard drive (like needing massive storage on a budget), you should be replacing your old drive with an SSD. The speed difference is enormous — we're talking 5 to 20 times faster for everyday tasks.
2.5-inch SATA SSD — this is the most common replacement for an old hard drive. It uses the same SATA connector as your old drive, so it's a direct swap in both desktops and laptops. A 1 TB SATA SSD runs around $160–$200 CAD in 2026. This is what most people need.
M.2 NVMe SSD — a small stick that plugs directly into the motherboard, no cables needed. Significantly faster than SATA, but your motherboard needs an M.2 slot to use one. Most PCs from 2018 onward have this slot. Check your motherboard manual or look for a small horizontal slot near the CPU.
M.2 SATA SSD — looks like an NVMe stick but uses the older SATA protocol. Some older M.2 slots only support SATA, not NVMe. Check your motherboard specs to see which type your slot accepts — they're not always interchangeable.
How much space do you need? In my experience, most home users do just fine with a 250 GB SSD — their documents, photos, and programs rarely come close to filling it. 500 GB gives you extra breathing room if you store a lot of photos or install many programs. 1 TB if you have a large game library or work with video files. 2 TB for serious media collections or professional work. Don't pay for space you'll never use.
Budget pick (240 GB): Kingston A400 — reliable, fast enough for most home users, and one of the best-selling SATA SSDs on the market. Great for the majority of home users who don't need a lot of storage.
Check Current Price →
Best value (1 TB): TeamGroup T-Force Vulcan Z — Amazon's Choice for 1 TB SATA SSDs. Solid speeds, great reviews, and much more affordable than Samsung.
Check Current Price →
3 What You'll Need
Gather everything before you start — there's nothing worse than having your computer half-apart and realizing you're missing a cable.
A Phillips-head screwdriver — a small one (#1 or #0) for laptops, standard size for desktops.
Your new SSD — make sure you've bought the right type for your computer (see Section 2, or our full SSD buying guide if you haven't picked one yet).
A SATA-to-USB adapter or external enclosure — only needed if you plan to clone your old drive. This lets you connect the new SSD externally so you can copy everything before doing the physical swap. You can find these for $15–$30 CAD on Amazon.
Check Current Price →
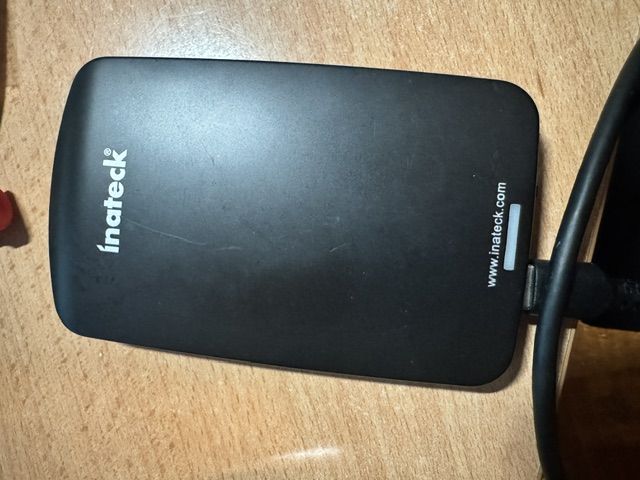
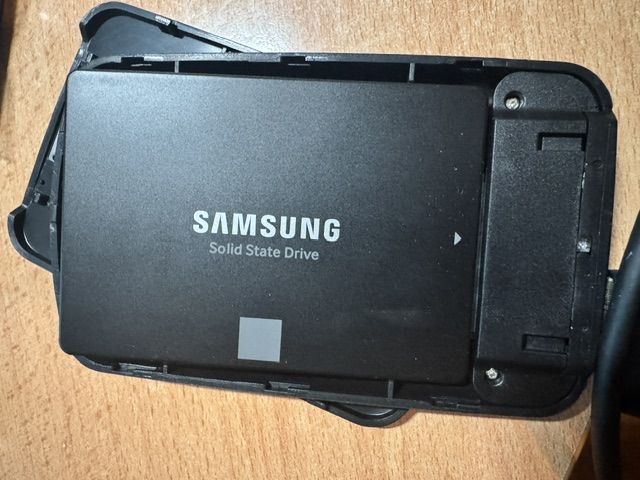
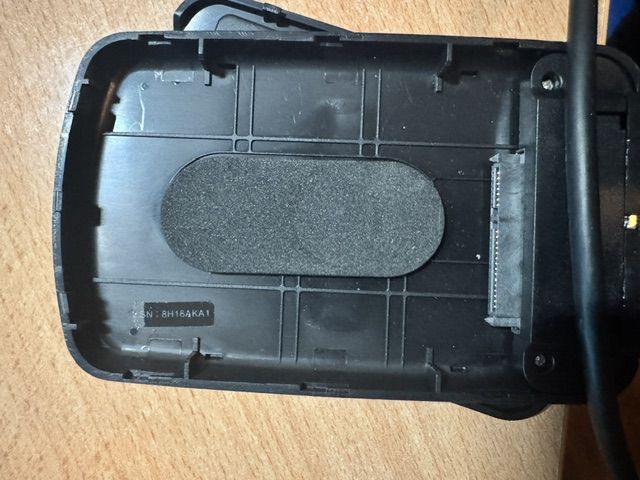
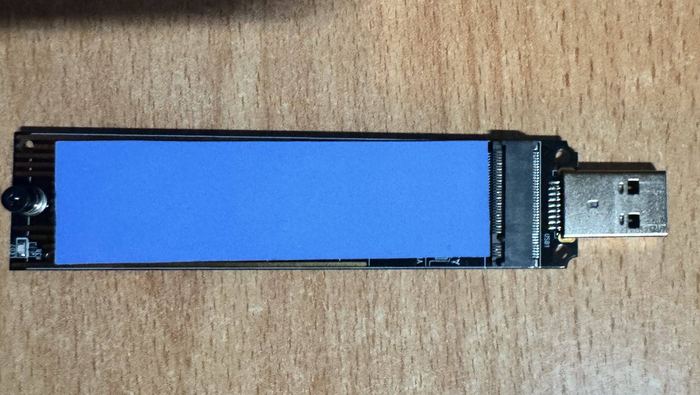
Note — SATA vs. M.2: the adapter above is for 2.5" SATA drives. If your old drive is an M.2 NVMe drive instead (common in thinner laptops), you'll need a separate M.2 NVMe-to-USB adapter — they're not interchangeable, since the connector and protocol are different. Here's one I've actually used on a real job, pulling data off a laptop's M.2 drive:
A 2.5" to 3.5" mounting bracket — only needed for desktops. SSDs are physically smaller than traditional hard drives, so a bracket holds them securely in a standard drive bay. Some SSD brands include one in the box. Your SSD will also work fine just sitting in the bay unsecured if you're not moving the computer around — plenty of techs do this, myself included.
Check Current Price →
A USB drive (8 GB or larger) — only needed if you're doing a fresh install of Windows instead of cloning.
4 Back Up Your Data First
Before you touch anything inside the computer, back up your data. This is non-negotiable. Even if you're planning to clone, things can go wrong — drives can fail during the cloning process, clones can be corrupted, and mistakes happen. Having a separate backup means you can always recover.
At minimum, copy these to an external drive or cloud storage:
Documents — the entire Documents folder, plus anything on your Desktop.
Photos and videos — check both your Pictures folder and Downloads.
Browser bookmarks — export them or make sure your browser is syncing to an account.
Email — if you use a desktop email client like Outlook, export your data file (.pst).
Anything else you can't replace — music, tax documents, work files, game saves.
Don't worry about backing up programs — those can be reinstalled. Focus on files you can't get back.
5 Desktop: Replacing the Drive
Desktop hard drives are easy to access and swap. The whole process takes about 10 minutes once you know where everything is.
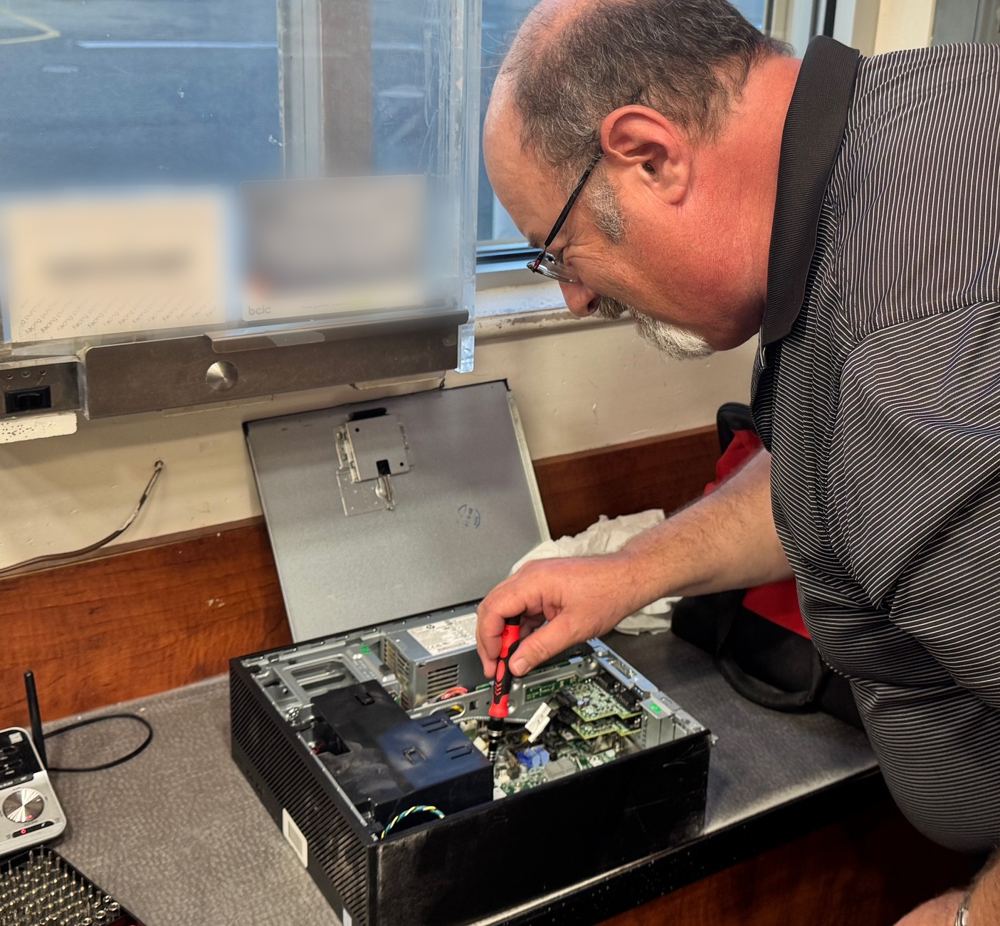
1. Shut down your computer and unplug it from the wall. Press the power button once to discharge any residual electricity.
2. Remove the side panel — usually held on by one or two thumbscrews on the back of the case.
3. Locate your hard drive — it's typically in a cage or bracket near the front-bottom of the case. You'll see two cables connected to it: a wide, flat SATA data cable and a slightly wider SATA power cable.
4. Disconnect both cables from the old drive. They pull straight out — don't twist or force them.
5. Remove the screws holding the drive in the bay (usually 2–4 screws on the sides) and slide the drive out.
6. If you're installing a 2.5-inch SSD, attach it to a 3.5" bracket if you have one, then slide it into the bay and secure it with screws. Connect the same two cables — SATA data and SATA power — to the new drive.
7. If you're installing an M.2 NVMe SSD, locate the M.2 slot on your motherboard (a small horizontal slot, sometimes with a heatsink over it). Remove the screw at the end of the slot, insert the M.2 stick at an angle, then press it flat and secure it with the screw. No cables needed.
8. Put the side panel back on and plug the computer back in.
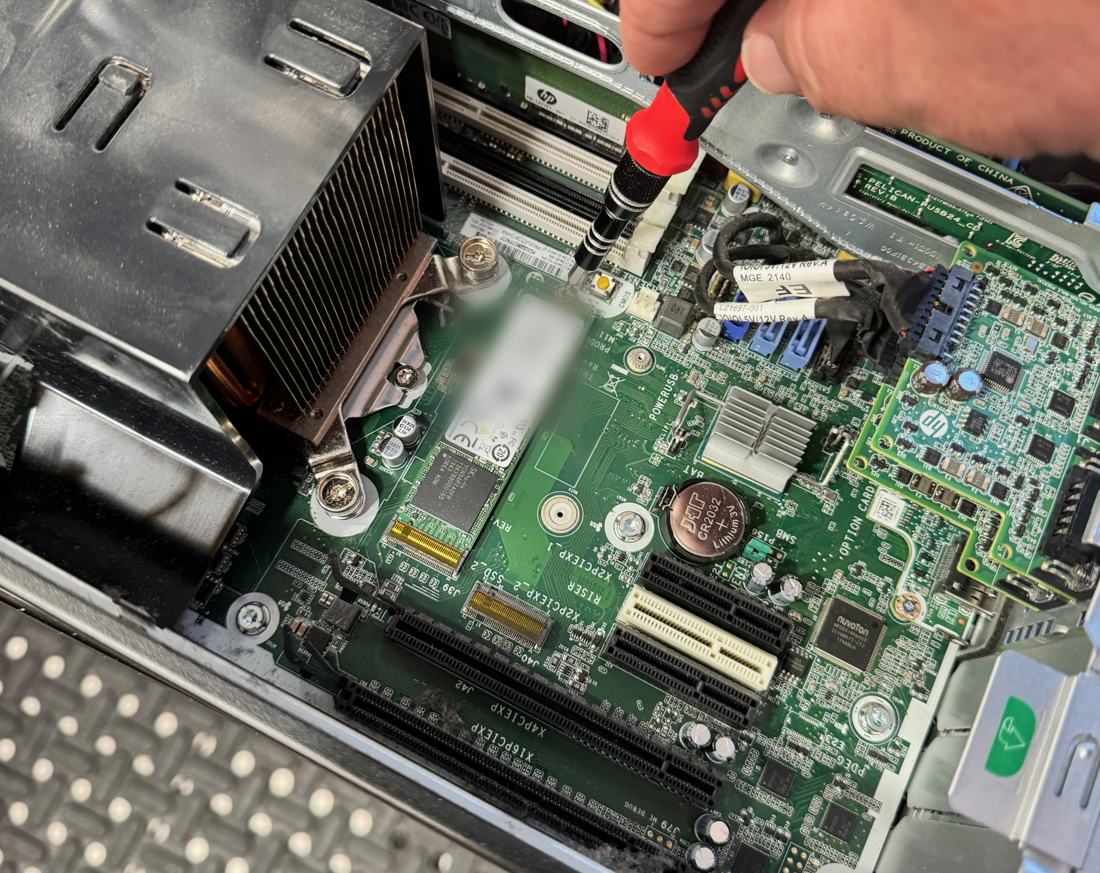
If you're swapping a whole desktop for an identical replacement machine rather than just the drive, moving the M.2 stick from the old computer into the new one often brings the entire Windows installation, settings and software with it — no cloning, no reinstall. I did exactly that on a site visit where a replacement PC wouldn't connect to the network: the M.2 out of the old machine went into the new one and it came up configured and working.
This works best when the two machines are the same model. Different hardware can mean driver trouble or a Windows reactivation prompt, and if the drive is BitLocker-encrypted you'll need the recovery key before it will boot anywhere else.
6 Laptop: Replacing the Drive
Laptop drives are a bit more fiddly but still very doable. The biggest variable is how easy your specific laptop makes it to access the drive bay — some have a dedicated access panel, others require removing the entire bottom cover, and still others require removing the back as well as numerous screws and maybe even other hardware to get at the hard drive.
1. Shut down the laptop and unplug it. Remove the battery if it's removable. If the battery is built-in, that's fine — just make sure the laptop is completely off (not sleeping).
2. Flip the laptop over. Look for a small panel on the bottom secured by one or two screws — many laptops have a dedicated panel for the hard drive. If there isn't one, you'll need to remove the entire bottom cover (usually 8–12 small screws around the edges).
3. Locate the hard drive. In most laptops, it's a 2.5-inch drive sitting in a bracket or caddy, connected via a SATA ribbon cable or plugged directly into a SATA connector on the motherboard.
4. If the drive is in a caddy or bracket, unscrew the bracket from the laptop frame, then gently slide the drive away from its connector. Remove the bracket from the old drive (usually 4 small screws on the sides) and attach it to your new SSD.
5. Slide the new SSD into the connector, secure the bracket back in place, and replace the bottom panel.
6. For M.2 drives in laptops: find the M.2 slot (usually visible once the bottom cover is off), remove the screw, swap the stick, and replace the screw. Same as a desktop M.2 install.
Before handling any internal components, touch a metal part of the computer frame to discharge static. Be gentle with connectors — laptop SATA cables in particular are delicate and can tear if forced. If something doesn't come out easily, look for a latch or clip you might have missed rather than pulling harder.
7 Clone vs. Fresh Install — Which Should You Choose?
Now that the new drive is physically installed, you need to get Windows running on it. You have two options, and the right choice depends on your situation:
Cloning creates an exact copy of your old drive on the new one — Windows, programs, settings, files, everything. When you boot from the new drive, it looks and works exactly like the old one, just faster.
Choose cloning if: Your old drive is still working and healthy. You don't want to reinstall all your programs. You want to be up and running quickly with everything exactly how it was.
The downside: Any problems on the old drive — bloatware, registry clutter, hidden malware — come along for the ride, not to mention you'll often hit an error when trying to copy the drive.
A fresh install wipes the new drive and installs a brand-new copy of Windows. You start with a clean, fast system and reinstall only the programs you actually need.
Choose a fresh install if: Your old drive is failing and can't be reliably cloned. You've been meaning to clean up your system anyway. The old drive had malware or software problems. You want maximum performance on the new drive.
The downside: You'll need to reinstall all your programs, reconfigure settings, and restore your files from your backup. This takes a few hours of setup time.
My recommendation? If your old drive is healthy and your system was running fine (just slow because of the hard drive), clone it. If the old drive was having issues or the system felt bloated and sluggish even beyond the drive speed, go fresh.
8 How to Clone Your Old Drive
You'll need your old drive and new drive connected to the computer at the same time. For desktops, you can install both internally. For laptops (which only have one drive slot), connect the new SSD externally using a SATA-to-USB adapter, clone to it, then swap the drives physically.
1. Connect the new SSD — either internally in a desktop or via a USB adapter for laptops.
2. If Windows asks you to initialize the new drive, go ahead — choose GPT if your computer uses UEFI (most modern PCs), or MBR if it's an older system. If you're not sure, match whatever your old drive uses — check in Disk Management by right-clicking your old drive and choosing Properties → Volumes.
3. Download cloning software. There are several good free options: Macrium Reflect Free, Clonezilla (free and open source), or the cloning tool that may have come with your SSD (Samsung, Crucial, and Western Digital all offer their own). Avoid random cloning tools from unknown developers.
4. Open the cloning software, select your old drive as the source and the new SSD as the destination. If the software offers an "SSD alignment" or "optimize for SSD" option, enable it.
5. Start the clone. This can take anywhere from 20 minutes to a few hours depending on how much data you have.
6. When it's done, shut down, remove the old drive (or disconnect it), and make sure the new SSD is in the primary drive slot. Boot up — everything should look exactly as it did before, just faster.
The single most important step in cloning is making sure you've selected the right drives. Cloning overwrites the destination drive completely. If you accidentally set the new empty drive as the source and your old drive as the destination, you'll wipe all your data. Take an extra moment to verify which drive is which before clicking Start.
9 How to Do a Fresh Windows Install
If you're starting clean, you'll need a Windows installation USB. This is the same process covered in Section 9 of our How to Speed Up an Old PC guide, but here's the short version:
1. On a working computer, go to microsoft.com and search for "Create Windows 11 installation media" (or Windows 10 if your PC doesn't support 11). Download the Media Creation Tool.
2. Plug in a USB drive (8 GB or larger — it will be erased) and use the tool to create installation media.
3. Plug the USB into the computer with the new SSD. Turn it on and press the boot menu key — usually F12, F11, or Esc depending on your manufacturer. Select the USB drive.
4. Follow the Windows installer. When it asks for a product key, if your machine already had Windows on it, just click "I don't have a product key" and continue — Windows will activate automatically later based on your hardware. When it asks where to install, select your new SSD. If there are existing partitions on it (from a previous clone attempt or initialization), delete them all so you have one block of Unallocated Space, then select that and click Next.
5. Windows will install and restart a few times. Follow the setup prompts.
6. Once you're at the desktop, go to Settings → Windows Update and install all available updates. Then install your graphics driver from the manufacturer's website (nvidia.com, amd.com, or intel.com).
7. Restore your files from your backup and reinstall your programs.
Windows activation: If Windows was previously activated on this computer, it should activate automatically on the new drive — the license is tied to your hardware, not the drive. If it doesn't, go to Settings → System → Activation and use the troubleshooter, or enter your product key if you have one.
10 After the Swap — What to Check
Once you're up and running on the new drive, take a few minutes to verify everything is working properly:
1. Confirm the new drive is detected properly. Open File Explorer and check that your C: drive shows the correct size. A 1 TB SSD should show around 930 GB of total space (this is normal — manufacturers and Windows measure differently).
2. Check that TRIM is enabled (for SSDs). Open Command Prompt as Administrator and type: fsutil behavior query DisableDeleteNotify. If it returns 0, TRIM is enabled and your SSD will maintain its performance over time. If it returns 1, enable it with: fsutil behavior set DisableDeleteNotify 0.
3. Make sure your BIOS boot order is correct. Your computer should be booting from the new SSD, not the old drive (if it's still connected). You can check in BIOS — press F2 or Delete during startup.
4. Run Windows Update. Make sure you're fully up to date, especially after a fresh install.
5. Verify your backup. Open a few backed-up files to confirm everything transferred correctly before you format or repurpose the old drive.
6. What to do with the old drive: If it's a healthy HDD, you can repurpose it as a secondary storage drive in a desktop, or put it in an external enclosure for backup storage — see our guide to picking the right one. If it was failing, dispose of it properly — many electronics stores and recyclers accept old hard drives. If it contains sensitive data, either physically destroy it or use a secure erasure tool before disposing of it.
Rather Have a Pro Handle It?
Hard drive replacements, SSD upgrades, and drive cloning — this is everyday work in my shop. If you're in the Nanaimo, BC area and you'd rather not open up the computer yourself, BigMike Computer Services can have your new drive installed and your data migrated, usually within a day or two.
Over 30 years of doing this work. Swapping drives is one of the simplest upgrades, but it's also one of the most satisfying — the look on someone's face when their old computer boots in 15 seconds never gets old.
Visit BigMike Computer Services →— BigMike | Computer Repair Technician, Nanaimo BC
📧 BigMikeNanaimo@gmail.com